Roasted Cauliflower Salad

Roasted Cauliflower Salad


	Roasted Cauliflower Salad


Ingredients:
  • 1 medium head cauliflower, cut into florets
  • 3 large carrots, cut into 1 inch (2.5 cm) pieces
  • 1 tablespoon ground cumin
  • 2 teaspoons paprika
  • kosher salt, to taste
  • black pepper, to taste
  • 2 tablespoons olive oil
  • ¼ medium red onion, thinly sliced
  • 1 cup fresh italian parsley (35 g), roughly chopped

  • DRESSING
  • ¼ cup tahini (60 mL)
  • 1 clove garlic, grated
  • 2 tablespoons lemon juice
  • ¼ cup water (60 mL)
  • ¼ cup olive oil (60 mL)
  • kosher salt, to taste
  • pepper, to taste
Instructions:
  1. Preheat the oven to 425°F (220°C). Line a baking sheet with parchment paper.
  2. In a large bowl, combine the cauliflower, carrots, cumin, paprika, salt, pepper and olive oil. Toss until well-coated.
  3. Spread the vegetables on the baking sheet in a single layer and roast for 20-25 minutes, until the carrots are tender.
  4. Make the dressing: In a medium bowl, whisk together the tahini, garlic, lemon juice, and water. While whisking, slowly drizzle in the olive oil until the dressing is emulsified. Season with salt and pepper.
  5. In a large bowl, mix together the onion and parsley. Add the roasted cauliflower and carrots, and toss well.
  6. Drizzle the salad with the dressing, then serve.
  7. Enjoy!

Source: tasty.co
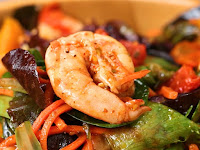
Roasted Shrimp & Veggie Salad

Roasted Shrimp & Veggie Salad


Roasted Shrimp & Veggie Salad


Ingredients:
  • 1 cup cherry tomato (200 g), sliced
  • 1 cup shredded carrot (120 g)
  • 1 cup yellow bell pepper (100 g), diced
  • 1 cup red onion (150 g), diced
  • 1 cup asparagus (175 g), diced
  • 1 lb shrimp (455 g)
  • olive oil, to coat
  • chili powder, to taste
  • 1 teaspoon fresh oregano, to taste
  • salt, to taste
  • pepper, to taste
  • lime juice, to taste
  • 1 large handful mixed greens

  • CHILI LIME VINAIGRETTE DRESSING
  • 3 tablespoons lime juice
  • 2 tablespoons olive oil
  • 1 tablespoon honey
  • ½ teaspoon chili powder
  • salt, to taste
  • pepper, to taste
Instructions:
  1. Preheat oven to 400˚F (200˚C).
  2. Add cut vegetables to a baking sheet lined with parchment paper.
  3. Drizzle in olive oil and sprinkle with seasonings to your preference. Bake for 10 minutes.
  4. Move veggies to the side to make space in the center of the baking sheet and add shrimp in a single layer.
  5. Drizzle with olive oil and sprinkle with seasonings and lime juice to your preference. Bake for 5-8 minutes, until shrimp is fully cooked. Be careful not to overcook.
  6. Mix dressing ingredients together in a small bowl.
  7. In a large salad bowl, combine mixed greens, roasted shrimp, veggies, and vinaigrette dressing together.
  8. Enjoy!

Source: tasty.co
Steak With Garlic Butter

Steak With Garlic Butter


	Steak With Garlic Butter


Ingredients:
  • 1 lb thick rib eye steak (455 g), 1 inch (2 cm) thick
  • 2 tablespoons kosher salt
  • 2 tablespoons freshly ground black pepper
  • 4 tablespoons canola oil
  • 3 tablespoons butter
  • 2 sprigs fresh thyme
  • 2 bunches fresh rosemary
  • 2 cloves garlic, crushed
Instructions:
  1. Preheat oven to 250°F (120°C).
  2. Season the steak evenly with the salt and pepper on all sides.
  3. Place the steak on a wire rack on top of a baking sheet. Bake for 35 minutes.
  4. Heat the canola oil in a skillet or stainless steel pan over high heat until smoking. Sear the steak on one side for 30 seconds, then flip.
  5. Immediately, add the butter, thyme, rosemary, and garlic, swirling the pan to melt the butter quickly.
  6. Place the herbs and garlic on top of the steak, and push the steak toward the top of the pan. Tilt the pan toward you to pool the butter near the bottom. Using a spoon, continuously scoop the butter over the top of the steak for about 30–45 seconds.
  7. This helps not only flavor the steak, but also helps cook the steak faster. If you prefer your steak medium or medium-well, cook your steak longer.
  8. To test the doneness of your steak, lightly press the tip of your left index finger to the tip of your left thumb. The fleshy area below the thumb should feel how rare steak feels pressing the surface of the steak. For medium-rare steak, touch your middle finger to your thumb and press the area below your thumb. For medium, touch your fourth finger to your thumb. For well done, touch your pinky to your thumb.
  9. Rest the steak for 10 minutes on a cutting board. Slice, then serve!
  10. Enjoy!

Source: tasty.co
Roasted Cauliflower And Curry Soup

Roasted Cauliflower And Curry Soup


	Roasted Cauliflower And Curry Soup


Ingredients:

    CRISPY CHICKPEAS
  • 14 oz can of chickpeas (395 g), 1 can, rinsed and drained
  • 4 teaspoons curry powder
  • 1 teaspoon garlic powder
  • 1 teaspoon onion powder
  • 1 teaspoon ground coriander
  • 1 teaspoon ground turmeric
  • 1 teaspoon kosher salt

  • CURRIED CAULIFLOWER SOUP
  • 1 medium head cauliflower, cut into florets
  • 1 tablespoon coconut oil, melted + 2 tablespoons, divided
  • kosher salt, to taste
  • freshly ground black pepper, to taste
  • 1 small yellow onion, diced
  • 1 jalapeño, diced
  • 2 cloves garlic cloves, minced
  • 3 tablespoons red curry paste
  • 14 oz coconut milk (415 mL), 1 can
  • 4 cups vegetable broth (960 mL)
  • scallion, sliced, for serving
  • fresh cilantro, for serving
  • lime wedge
Instructions:
  1. Make the crispy chickpeas: Preheat the oven to 400˚F (200˚C).
  2. In a medium bowl, combine the chickpeas, curry powder, garlic powder, onion powder, coriander, turmeric, and salt, and toss to coat the chickpeas. Transfer the chickpeas to a small baking sheet and spread in an even layer.
  3. Bake for 30 minutes, or until the chickpeas are crispy. Remove from the oven and let cool.
  4. Make the soup: Increase the oven temperature to 450˚F (220˚C).
  5. Add the cauliflower florets to a medium bowl with the melted coconut oil, salt, and pepper. Toss to coat, then transfer the cauliflower to a baking sheet.
  6. Roast for 25 minutes, until browned and tender.
  7. Melt the remaining 2 tablespoons of coconut oil in a large saucepan over medium-high heat. Add the onion and jalapeño, and cook until the onion begins to caramelize, about 2 minutes. Add the garlic and continue to cook for 2 minutes more, until the garlic is toasted and fragrant.
  8. Add the curry paste and cook for 1 minute, stirring to dissolve. Add the coconut milk and vegetable broth and season with salt and pepper. Remove from the heat.
  9. Add the roasted cauliflower to a blender with the broth and puree until smooth.
  10. Ladle the soup into bowls. Top with the crispy chickpeas, scallions, and cilantro, and serve with lime wedges.
  11. Enjoy!

Source: tasty.co
Crockpot Thai Chicken Soup

Crockpot Thai Chicken Soup


	Crockpot Thai Chicken Soup

Crockpot Thai Chicken Soup is a lightened up, and super easy to make, version of Thai chicken curry. It's also one of the few slow cooker chicken recipes that cooks for 8-10 hours so you can pop everything in before work and come home to dinner. This has turned into one of our favorite healthy recipes!

Ingredients:
  • 6 medium carrots, chopped
  • 3 red bell pepper, chopped
  • 1 1/2 medium yellow onion, chopped
  • 3 2-inch piece of ginger, minced
  • 12 garlic cloves, minced
  • 12 tablespoon red curry paste
  • 6 tablespoon fish sauce
  • 6 tablespoon soy sauce (sub coco aminos for paleo)
  • 3 tablespoon palm sugar
  • 9 cup chicken stock
  • 12 boneless, skinless chicken thighs
  • 6 cans coconut milk
  • 3 lime
  • 24 ounce rice vermicelli, cooked according to package directions (omit for paleo or sub zucchini noodles)
  • Optional toppings: lime wedges, sauteed mushrooms, cilantro, cherry tomatoes, black pepper
Instructions:
  1. Add all the ingredients EXCEPT the coconut milk, lime, and rice vermicelli to your crock pot and stir together. Cover and cook on low for 8-10 hours.
  2. Remove the chicken thighs and shred using two forks. Return the chicken to the crock pot. Add the coconut milk and stir. Let the coconut milk warm for 10-15 minutes before serving.
  3. Place the cooked rice vermicelli into soup bowls and top with the Thai chicken soup. Squeeze a little lime over the top and serve with any or all of the optional toppings.
  4. Enjoy!

Source: theendlessmeal.com
Classic Beef Stew Recipe

Classic Beef Stew Recipe


	Classic Beef Stew Recipe


Ingredients:
  • 2 lb kroger beef chuck roast (910 g)
  • ½ teaspoon kosher salt, plus more for taste
  • ½ teaspoon black pepper, plus more to taste
  • 2 tablespoons canola oil
  • 2 cups yellow onion (300 g), diced
  • 2 cups celery (450 g)
  • 2 cups carrot (240 g), diced
  • 2 cloves garlic, minced
  • 2 tablespoons tomato paste
  • 1 cup red wine (240 mL)
  • 2 cups beef stock (480 mL)
  • 28 oz diced tomatoes (425 g)
  • 1 teaspoon dried rosemary
  • 1 teaspoon dried thyme
  • 1 bay leaf
  • egg noodle, cooked, for serving
Instructions:
  1. Cut the beef into cubes, then season generously with salt and pepper.
  2. Heat the canola oil in a large Dutch oven or pot over medium high heat. Working in batches, sear the beef on all sides until well browned. Do not overcrowd the pan. Transfer the meat to a plate and set aside.
  3. Add the onion, celery, carrots, and garlic to the pan and cook until tender, about 5 minutes.
  4. Add the tomato paste to the center of the pot and cook for 1 minute. Stir the tomato paste into the vegetables and continue cooking until fragrant, about 5 minutes.
  5. Pour in the wine to deglaze the pan, scraping up any browned bits from the bottom of the pot with a wooden spoon.
  6. Add the beef stock and tomatoes and stir to combine, then add the rosemary, thyme, pepper, salt, and bay leaf. Return the beef to the pot, making sure it is submerged in the braising liquid.
  7. Bring to a boil, then cover, reduce the heat to low, and simmer until the meat is tender, about 3 hours.
  8. Shred larger pieces of beef with a fork or tongs. Serve the braised beef and sauce over cooked egg noodles.
  9. Enjoy!

Source: tasty.co
Keto Bacon Cauliflower “Mac” ‘N’ Cheese

Keto Bacon Cauliflower “Mac” ‘N’ Cheese


	Keto Bacon Cauliflower “Mac” ‘N’ Cheese

Just because you're on a keto diet doesn't mean you should forsake all comfort food. This super indulgent mac 'n' cheese manages to stay low-carb thanks to one magical ingredient: cauliflower. Add bacon to the mix and you get the perfect dinner.

Ingredients:
  • 4 strips bacon
  • 4 cups water (960 mL)
  • 1 large head cauliflower
  • 2 teaspoons kosher salt, divided
  • 4 oz cream cheese (115 g)
  • ⅓ cup heavy cream (80 mL)
  • ¼ teaspoon cayenne pepper
  • 1 teaspoon paprika
  • 2 cups shredded cheddar cheese (200 g)
  • fresh parsley, finely chopped, for garnish
Instructions:
  1. In a large pan over medium-high heat, cook the bacon for 6 minutes, or until crisp. Remove the bacon from the pan, pat off excess grease with a paper towel, then chop and set aside.
  2. Add the water to a medium pot and bring to a boil.
  3. While the water heats up, chop the cauliflower into small pieces.
  4. Add 1 teaspoon of salt and the cauliflower to the boiling water, then cover and cook for 4 minutes, or until slightly tender. Drain the cauliflower and set aside.
  5. In the same saucepan, combine the cream cheese, heavy cream, remaining teaspoon of salt, the cayenne, and paprika. Stir to combine, then cook for 4 minutes, until smooth and thick.
  6. Fold in the cauliflower, then add the cheddar cheese. Stir until the cheese has melted, then fold in the bacon.
  7. Scoop into serving bowls and garnish with parsley.
  8. Enjoy!

Source: tasty.co
Cheesy Chicken Broccoli Bake

Cheesy Chicken Broccoli Bake


	Cheesy Chicken Broccoli Bake


Ingredients:
  • 1 cup long grain rice (200 g)
  • ¼ teaspoon black pepper
  • ½ teaspoon onion powder
  • 1 can cream of chicken
  • 1 cup shredded cheddar cheese (100 g)
  • 2 cups broccoli (300 g), diced
  • 1 ½ cups chicken broth (360 mL)
  • cheddar cheese, for topping
Instructions:
  1. Heat oven to 375°F (190°C).
  2. In a casserole dish, combine rice, pepper, onion powder, cream of chicken, cheese, broccoli, and chicken stock. Mix until everything is combined.
  3. Lay chicken on top of the rice mixture. Space evenly.
  4. Cover with foil and bake for 50 minutes.
  5. Take off cover and top the chicken with more cheese. Bake uncovered for another 5 minutes or until cheese is melted.
  6. Enjoy!

Source: tasty.co
Pumpkin Mac ‘n’ Cheese

Pumpkin Mac ‘n’ Cheese


	Pumpkin Mac ‘n’ Cheese


Ingredients:
  • 2 ¼ cups pumpkin (500 g), or squash, chopped
  • 2 tablespoons oil
  • 1 teaspoon salt
  • 1 teaspoon pepper
  • 1 teaspoon dried sage

  • SAUCE
  • ⅓ cup butter (40 g)
  • ⅓ cup flour (40 g)
  • 2 ½ cups milk (600 mL)
  • ¼ teaspoon ground nutmeg
  • 1 teaspoon garlic powder
  • 1 teaspoon pepper
  • 2 cups cheddar cheese (200 g)
  • ¼ cup parmesan cheese (25 g)
  • 2 ½ cups macaroni pasta (250 g), cooked and drained

  • TOPPING
  • ½ cup cheddar cheese (50 g)
  • ½ cup mozzarella cheese (50 g)
  • ¼ cup parmesan cheese (25 g)
Instructions:
  1. Preheat the oven to 190°C (375°F)
  2. Chop up the pumpkin into chunks and place on a baking tray.
  3. Drizzle over the oil, salt, pepper, and ground sage, and coat evenly with your hands.
  4. Roast in the oven for 20 minutes.
  5. Once cooked leave to cool slightly and blend ⅓ of the pumpkin, set aside.
  6. For the sauce, in a large ovenproof pan, melt the butter over a medium-low heat.
  7. Gradually mix in the flour to create a roux.
  8. Add the milk in 4-5 parts stirring well in between.
  9. Continue to stir and cook the sauce for a further 5-10 minutes or until the sauce is simmering and thickened.
  10. Stir in the ground nutmeg, garlic powder, pepper, cheddar, and Parmesan.
  11. Stir in the blended pumpkin.
  12. Stir in the remaining whole pumpkin and macaroni, mix until combined.
  13. Top with the cheddar, mozzarella, and Parmesan.
  14. Grill for 10 minutes at 200°C (400°F) until the cheese is brown and bubbling.
  15. Serve.
  16. Nutrition Calories: 1525 Fat: 99 grams Carbs: 110grams Fiber: 6 grams Sugars: 49 grams Protein: 49 grams
  17. Enjoy!

Source: tasty.co
Cheesy Meatball Bake Recipe

Cheesy Meatball Bake Recipe


	Cheesy Meatball Bake Recipe


Ingredients:
  • 1 lb ground beef (455 g)
  • 1 lb hot italian sausage (455 g)
  • 4 cloves garlic, minced
  • ½ cup fresh parsley (10 g), chopped
  • ½ cup parmesan cheese (55 g)
  • 1 teaspoon salt
  • ½ teaspoon pepper
  • 1 cup italian bread crumbs (115 g)
  • 2 eggs
  • 1 cup milk (240 mL)
  • 24 oz marinara sauce (680 mL)
  • 2 cups mozzarella cheese (200 g)
Instructions:
  1. In a large mixing bowl, combine ground beef, Italian sausage, garlic, parsley, parmesan cheese, salt, pepper, bread crumbs, eggs, and milk. Mix until everything is fully infused together.
  2. Roll into 4-5 ounce (113-142 g) meatballs. For even amounts, use a medium-sized ice cream scooper.
  3. Preheat oven to 425°F (220°C).
  4. Over medium heat, add 1 tablespoon of olive oil to a pan, and brown the meatballs on both sides for about 2-3 minutes or until you create a nice crispy sear. Cook about half way through. They will finish cooking in the oven.
  5. In a casserole dish, spread a few tablespoons of marinara sauce to the bottom of the pan to help prevent sticking. Then place meatballs in the casserole dish and add the remaining jar of marinara sauce. Top with 2 cups of shredded mozzarella cheese.
  6. Cover in foil and bake at 425°F (220°C) for 25 minutes or until the cheese is fully melted and the meatballs are fully cooked.
  7. Serve and garnish with parsley.
  8. Enjoy!

Source: tasty.co
Southwest Chicken Alfredo Pasta Bake

Southwest Chicken Alfredo Pasta Bake


	Southwest Chicken Alfredo Pasta Bake


Ingredients:
  • 8 oz fusilli pasta (225 g)
  • 8 oz corn (225 g), drained
  • 8 oz black beans (225 g), drained & rinsed
  • 2 cups cooked chicken (250 g), shredded
  • 16 oz alfredo sauce (455 g)
  • 1 tablespoon taco seasoning
  • 1 cup monterey jack cheese (100 g)
  • 1 cup cheddar cheese (100 g)

  • GARNISH
  • fresh cilantro, chopped
Instructions:
  1. Preheat oven to 350˚F (180˚C)
  2. Cook the fusilli pasta according to box instructions. This will make about 4½ cups (900g) of cooked pasta.
  3. In a large bowl, mix together cooked pasta, corn, black beans, cooked chicken, alfredo sauce, and taco seasoning.
  4. Pour into a 9x13-inch (23x33 cm) baking pan and spread evenly around the pan.
  5. Sprinkle Monterey Jack and cheddar cheese over the top and cover with foil.
  6. Bake for 35 minutes, uncovering after 20 minutes to allow the cheese to brown.
  7. Garnish with cilantro.
  8. Enjoy!

Source: tasty.co
Bake & Save Beef and Cheese Rigatoni Pasta

Bake & Save Beef and Cheese Rigatoni Pasta


	Bake & Save Beef and Cheese Rigatoni Pasta


Ingredients:
  • 2 lb ground beef (910 g)
  • salt, to taste
  • pepper, to taste
  • 3 tablespoons salted butter
  • garlic powder, to taste
  • ⅓ cup flour (40 g)
  • onion powder, to taste
  • 3 cups milk (710 mL)
  • 2 lb rigatoni (455 g), cooked
  • 4 eggs, beaten
  • 24 oz marinara sauce (680 g)
  • 3 cups shredded mozzarella cheese (300 g)
  • ½ cup parmesan cheese (55 g)
Instructions:
  1. Preheat oven to 375°F (190˚C.)
  2. In a skillet, cook and crumble the ground beef with garlic powder, onion, powder, salt, & pepper. Remove from pan and drain.
  3. In the same pan, melt the butter, and mix with the flour until it forms a paste.
  4. Add the milk gradually, and bring to a boil, until it thickens into a creamy sauce. Set aside.
  5. In a bowl, mix the rigatoni with the eggs. Divide between two 9x13 inch (23x33 centimeter) baking dishes.
  6. Layer on the marinara, ground beef, mozzarella, white sauce, and parmesan.
  7. Bake both for 30-35 minutes, or until cheese is melted and golden brown.
  8. Cool and freeze extra casserole up to 2 months. (To cook, transfer to the refrigerator overnight. Bake covered at 375°F (190°C) for 40 minutes. Remove cover and bake an additional 10 minutes.)
  9. Nutrition Calories: 1916 Fat: 61 grams Carbs: 223 grams Fiber: 12 grams Sugars: 21 grams Protein: 110 grams
  10. Enjoy!

Source: tasty.co
Chicken Parm Lasagna Recipe

Chicken Parm Lasagna Recipe


	Chicken Parm Lasagna Recipe


Ingredients:
  • 3 chicken breasts
  • salt, to taste
  • pepper, to taste
  • 1 cup all-purpose flour (125 g)
  • 5 eggs, divided
  • 2 cups italian bread crumbs (230 g)
  • vegetable oil, for frying
  • 2 cups ricotta cheese
  • 24 oz marinara sauce (680 g)
  • 8 lasagna noodles
  • 1 ½ cups shredded mozzarella cheese (150 g)
  • 1 ½ cups shredded parmesan cheese (160 g)
  • fresh basil, to garnish
Instructions:
  1. Cut chicken breasts in half (pound thin if necessary) and season with salt and pepper.
  2. Add the flour, 4 eggs, and bread crumbs to 3 separate shallow dishes. Beat the eggs. Coat the chicken in the flour, then the eggs, and finally in the bread crumbs.
  3. Heat the vegetable oil in a cast iron skillet over medium heat. Fry the chicken on both sides until golden brown, about 4 minutes on each side. Let drain on paper towels.
  4. In a medium bowl, combine the ricotta cheese and the remaining egg.
  5. Preheat the oven to 350°F (180°C).
  6. Spread about ⅓ of the marinara sauce over the bottom of a casserole dish. Top with 4 lasagna noodles, ½ of the ricotta mixture, and 3 chicken cutlets. Sprinkle with ½ cup of mozzarella and ½ cup of Parmesan cheese. Repeat to make another layer, then finish with the remaining sauce and mozzarella and Parmesan cheeses.
  7. Cover with foil and bake for 45-60 minutes, uncovering the lasagna for the last 10 minutes of baking.
  8. Serve with a sprinkle of fresh basil.
  9. Enjoy!

Source: tasty.co
Low-Carb Eggplant Lasagna

Low-Carb Eggplant Lasagna


	Low-Carb Eggplant Lasagna


Ingredients:
  • 2 large eggplants
  • 1 teaspoon sea salt, plus more to taste
  • olive oil, to taste
  • 5 cloves garlic, minced
  • ½ teaspoon red pepper flakes
  • 28 oz crushed san marzano tomato (795 g), 2 can
  • 6 leaves fresh basil, thinly sliced, plus more for garnish
  • 1 large egg
  • 15 oz ricotta cheese (425 g), 1 container
  • 2 cups shredded mozzarella cheese (200 g), divided
  • 1 cup grated parmesan cheese (110 g), divided
  • 2 teaspoons italian seasoning
Instructions:
  1. Preheat the oven to 375°F (190°C).
  2. Cut off the ends of the eggplant, then slice lengthwise about ⅛-inch (3-mm) thick.
  3. Sprinkle the eggplant slices with sea salt on both sides and let sit for 10 minutes to draw out moisture. Pat dry with paper towels to remove excess liquid.
  4. Lightly grease a griddle pan with olive oil and heat over medium heat. Grill the eggplant slices for 2-3 minutes on each side, or until grill marks are visible. Remove from the pan and set aside.
  5. In a medium saucepan, heat a drizzle of olive oil over medium-low heat, then add the garlic and red pepper flakes. Sauté for about 3 minutes, until the garlic is fragrant but not browned. Add the crushed tomatoes and 1 teaspoon of salt, stirring well to incorporate the garlic and red pepper. Simmer for 10 minutes, reducing the heat if the sauce begins to bubble too much. Add the basil and stir to combine. Remove from the heat and set aside.
  6. In a medium bowl, beat the egg, then add the ricotta, 1½ cups (150 g) of mozzarella, ¾ cup (80 g) of Parmesan, and the Italian seasoning. Mix well to combine.
  7. Assemble the lasagna. In a 9x13-inch (23x33-cm) baking dish, add enough sauce to cover the bottom of the dish and spread in an even layer. Add a layer of eggplant slices, covering the bottom of the dish completely. It’s okay if the eggplant slices overlap slightly. Add a layer of the ricotta mixture and spread in a thin, even layer. Repeat with the remaining ingredients, finishing with a layer of sauce. Sprinkle the remaining mozzarella and Parmesan on top.
  8. Bake for 45 minutes, until cheese is fully melted.
  9. Turn the broiler on high and broil for 5 minutes, or until the cheese on top is browned and bubbly.
  10. Remove the lasagna from the oven and let rest for 15-20 minutes before serving to give the lasagna time to set.
  11. Serve garnished with fresh basil.
  12. Enjoy!

Source: tasty.co
Spaghetti With Fresh Tomato Sauce

Spaghetti With Fresh Tomato Sauce


	Spaghetti With Fresh Tomato Sauce


Ingredients:
  • 1 lb spaghetti (455 g)
  • 2 tablespoons olive oil
  • 3 cloves garlic, minced
  • 2 cups cherry tomato (400 g)
  • salt, to taste
  • pepper, to taste
  • 1 cup white wine (235 mL)
  • 1 cup parmesan cheese (110 g)
  • ½ cup fresh basil (20 g), chopped
Instructions:
  1. Cook spaghetti in boiling salted water until it’s al dente. Reserve 1 cup (235 ml) of the pasta water before draining.
  2. While the spaghetti is cooking, heat olive oil in a large pan (it should be large enough to toss the pasta in). Add garlic and tomatoes, and stir until well-incorporated. Season with salt and pepper.
  3. Cook tomatoes down for 5 minutes until they soften and release some of their juices.
  4. Then add the wine and allow that to reduce for 5-10 minutes until you’re left with a syrupy sauce.
  5. Add the pasta to your sauce, along with a splash of pasta water and toss to coat it for about 1-2 minutes so the pasta finishes cooking and absorbs the flavor of the sauce.
  6. Add the parmesan and basil. Add another small splash of pasta water, if needed. Toss until the cheese is melted down and you’re left with a smooth sauce.
  7. Gradually add small amounts of pasta water, as needed, until the sauce reaches your desired smoothness.
  8. Top off with extra parmesan and basil and serve immediately.
  9. Enjoy!

Source: tasty.co
Baked Shrimp Scampi Linguine Pasta

Baked Shrimp Scampi Linguine Pasta


	Baked Shrimp Scampi Linguine Pasta


Ingredients:
  • 1 lb shrimp (500 g), peeled and deveined
  • 1 tablespoon salt
  • 1 tablespoon pepper
  • 1 tablespoon red chili flakes
  • 3 cloves garlic, minced
  • 6 oz butter (180 g), melted
  • 1 tablespoon lemon juice
  • ½ cup white wine (120 mL)
  • 8 oz linguine (250 g)
  • fresh parsley, to garnish
  • red chili flake, to garnish
Instructions:
  1. Preheat oven to 400˚F (200˚C).
  2. In a medium-sized casserole pan, combine shrimp, salt, pepper, red chili flakes, garlic, butter, lemon juice, and white wine.
  3. Bake for 10-13 minutes, or until shrimp turns pink and is fully cooked.
  4. Bring 4 quarts of water to a boil, add salt to taste, and cook linguine pasta al dente according to package directions, stirring occasionally.
  5. Strain linguine and combine with shrimp until pasta is fully coated in white wine scampi sauce.
  6. Garnish with chopped Italian parsley.
  7. Enjoy!

Source: tasty.co
Spaghetti With Garlic And Oil Pasta

Spaghetti With Garlic And Oil Pasta


	Spaghetti With Garlic And Oil Pasta


Ingredients:
  • salt, to taste
  • ½ lb spaghetti (225 g)
  • 3 tablespoons extra virgin olive oil
  • 4 cloves garlic, sliced
  • 1 teaspoon red chili flakes
  • 2 tablespoons fresh parsley, finely chopped, optional
Instructions:
  1. Bring a large pot of salted water to a boil. Cook the pasta according to package instructions. Save ¼ cup (60 ml) of pasta water, then drain.
  2. Add the olive oil and garlic to a large cold sauté pan. Turn the heat to medium-low and slowly heat up until the garlic is fragrant and lightly colored, about 3 minutes.
  3. Add the chile flakes and cook for another minute.
  4. Add the reserved pasta water and bring to a simmer. Add the cooked spaghetti and parsley, if using. Stir until the pasta is well-coated. Season with salt to taste.
  5. Enjoy!

Source: tasty.co
Creamy Lemon Butter Chicken

Creamy Lemon Butter Chicken


	Creamy Lemon Butter Chicken


Ingredients:
  • 6 bone-in, skin-on chicken thighs
  • 1 tablespoon paprika
  • salt, to taste
  • pepper, to taste
  • 3 tablespoons unsalted butter
  • 3 cloves garlic
  • ½ cup heavy cream (120 mL)
  • ¼ cup parmesan cheese (30 g)
  • 1 lemon, juiced
  • 2 cups fresh baby spinach (85 g)
  • 1 teaspoon dried thyme
  • 1 cup chicken broth (240 mL)
Instructions:
  1. Season chicken thighs with salt, pepper, and paprika.
  2. Melt 2 Tbsp. butter in a large oven-proof skillet over medium high heat. Add chicken, skin-side down, and sear both sides until golden brown. Drain excess fat and set aside.
  3. Melt 1 Tbsp. butter in the skillet. Add garlic, stir until fragrant, then add chicken broth, heavy cream, Parmesan, lemon juice, thyme, and stir. Bring to boil, then reduce heat to low.
  4. Stir in spinach, simmer until spinach has wilted and the sauce has thickened.
  5. Return chicken to the skillet. Bake at 400˚F (200˚C) for 25 minutes.
  6. Enjoy!

Source: tasty.co
Basil And Pesto Hasselback Chicken

Basil And Pesto Hasselback Chicken


	Basil And Pesto Hasselback Chicken


Ingredients:
  • 4 chicken breasts
  • 2 tablespoons red pesto
  • 1 handful fresh basil, roughly chopped
  • ½ cup mozzarella cheese (50 g)
Instructions:
  1. Preheat the oven to 350°F (180°C).
  2. Slice into the chicken several times, about 1 cm (½ inch) apart, but only cut about 85% of the way through, leaving the bottom intact.
  3. Cook the red pesto and basil on a medium heat until the basil is just wilted.
  4. Sprinkle over the mozzarella and stir until melted.
  5. Allow to cool to the touch, and then fill each segment of the chicken breast with about 1 teaspoon of the mixture.
  6. Bake in the centre of the oven for 18-22 minutes until the chicken is cooked through and the juices run clear.
  7. Enjoy!

Source: tasty.co
Easy Hasselback Chicken Recipe

Easy Hasselback Chicken Recipe


	Easy Hasselback Chicken Recipe


Ingredients:
  • ¼ cup fresh spinach (50 g)
  • ¼ cup ricotta cheese (50 g)
  • 2 chicken breasts
  • ¼ cup cheddar cheese (20 g)
  • 1 teaspoon paprika
  • salt, to taste
  • pepper, to taste
Instructions:
  1. Cook the spinach on a medium heat in a splash of oil for 3-5 minutes until it is slightly wilted.
  2. Stir in the ricotta and cook for a further 30-60 seconds. Allow to cool.
  3. Cut slits into the chicken breasts about 1cm (½ inch) apart but don’t cut all the way through - about 75% of the way down is what you should aim for.
  4. Stuff all of the spinach and ricotta mixture into the slits.
  5. Season the chicken with salt and pepper.
  6. Grate the cheddar and sprinkle it generously on top.
  7. Shake the ground paprika over the chicken to add some colour and flavour.
  8. Bake in the centre of a pre-heated oven for 20-25 minutes 400°F (200°C) until the cheese has melted and the juices are clear.
  9. Enjoy!

Source: tasty.co